How to Choose Binoculars for Birding (Without Overpaying)
How to choose binoculars for birding: start with 8x42, check five specs, and pay for glass and warranty, not hype. A step-by-step guide to spending wisely.
If you buy through links on this page we may earn a commission, at no cost to you. It never decides what we recommend. How we earn
In this article
- Quick answer: the specs to look for
- Step 1: Decide where you will bird
- Step 2: Pick an objective size
- Step 3: Check the five specs that matter most
- Step 4: Roof prism or porro prism?
- Step 5: Know which glass and coatings are worth paying for
- Step 6: Check build quality and waterproofing
- Step 7: Read the warranty before you buy
- Step 8: Make sure they fit you
- How much should you spend on birding binoculars?
- Why very cheap binoculars are a false economy
- Should you buy used binoculars?
- Special cases: small hands, kids and older birders
- Where to buy, and how to try before you commit
- Our picks for a first serious pair
- Common mistakes that waste money
- A quick checklist before you buy
- Sources
- Gear mentioned in this guide
- Frequently asked questions
Here is how to choose binoculars for birding without overpaying: start with an 8x42 roof prism model that is waterproof, shows a field of view of roughly 330 feet or more at 1,000 yards, has at least 16 mm of eye relief if you wear glasses, and focuses to about 7 feet or closer. Then spend on the things you can see, such as coatings and glass, and on a strong warranty, not on marketing labels. For most birders, the mid-priced tier from an established brand is where value peaks.
Quick answer: the specs to look for
| Spec | What to look for | Why it matters |
|---|---|---|
| Magnification | 8x (10x for open country) | Wider, steadier, brighter view |
| Objective lens | 42 mm (32 mm if weight matters) | Light gathering and brightness |
| Field of view | About 330 ft at 1,000 yd or wider for 8x42 | Easier to find moving birds |
| Eye relief | 16 mm or more for glasses | See the full view with glasses on |
| Close focus | About 7 ft or less | Feeder birds, butterflies |
| Weight | Roughly 20 to 25 oz for 42 mm | All-day comfort |
| Waterproofing | Sealed and gas purged | Rain, fog and humidity |
| Coatings | Fully multi-coated, phase-coated prisms | Brightness, contrast, sharpness |
If you want every number explained in plain terms, see our guide to what the numbers on binoculars mean.
Step 1: Decide where you will bird
Your habitat decides magnification more than anything else.
- Backyard, woods and parks: birds are close and move fast. Choose 8x. Its wider view helps you get on a bird quickly, and its depth of field keeps more of a branch in focus.
- Open country, water and hawk watches: birds are distant and often still. 10x shows more detail if you can hold it steady.
- A mix of everything: choose 8x. It has fewer weak spots.
Our full comparison of 8x42 vs 10x42 walks through the trade-offs in detail. Skip magnifications above 10x for handheld birding. At 12x the field narrows and shake becomes hard to control without support.
Step 2: Pick an objective size
The second number on a binocular is the objective lens diameter in millimeters. The Cornell Lab groups birding binoculars into three sizes:
- Full-size, about 42 mm: the standard. Bright, comfortable and forgiving.
- Compact, about 32 mm: lighter and smaller, dimmer in shade and at dusk.
- Pocket, about 25 mm: very small, dim in poor light and harder to hold steady.
Cornell’s reviewers found that lower-priced full-size binoculars can still perform well, because the larger lenses make up for less refined glass. They found a wider range of quality among compact models, and suggest that pocket binoculars are worth buying only at the premium end. In practical terms, that means a budget buyer gets the most for the money with a 42 mm pair.
Step 3: Check the five specs that matter most
Field of view
Field of view is the width of the scene you see, listed in feet at 1,000 yards or in degrees. For an 8x42, anything around 330 feet or more is good, and some models exceed 390 feet. A wider field makes it easier to find birds and follow them in flight.
Eye relief
Eye relief is how far behind the eyepiece your eye can be and still see the whole image. If you wear glasses while birding, look for about 16 mm or more. The eyecups should twist fully down. Our roundup of binoculars for glasses wearers focuses on this spec.
Close focus
Close focus is the nearest distance the binocular can focus. Around 6 or 7 feet is useful for feeders, bird baths and butterflies. Longer close focus is fine if you mostly watch distant birds.
Exit pupil
Exit pupil is the objective size divided by magnification: 5.25 mm for 8x42 and 4.2 mm for 10x42. A larger exit pupil gives a brighter image in dim light, up to the size your own pupil can open.
Weight
Most 8x42 roof prism binoculars weigh between about 20 and 25 oz. A few ounces may not sound like much, but it adds up on a long walk. A harness can spread the load if neck strain is an issue.
Step 4: Roof prism or porro prism?
Roof prism binoculars have straight barrels and a slim shape. Most modern birding binoculars use this design because it is compact and easier to seal against water. Roof prisms need phase-correction coatings to deliver a sharp, contrasty image. Zeiss introduced these coatings in 1988, and they are now standard on decent roof prism binoculars.
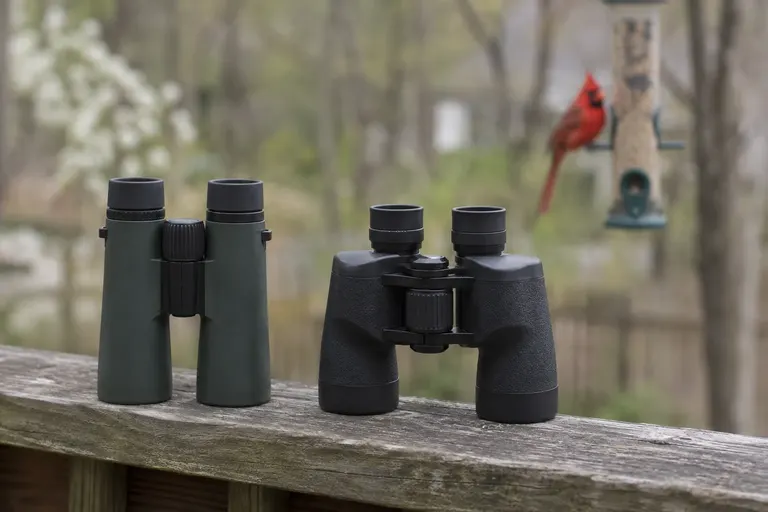
Porro prism binoculars have the familiar zigzag shape. They are simpler to make, which lets good porro designs deliver strong images at lower prices, and their offset lenses give a greater sense of depth. The downsides are bulk and fewer fully waterproof options.
For most buyers, a roof prism model is the practical choice. On a tight budget, a well-reviewed porro can be good value. Our guide to roof prism vs porro prism binoculars explains the optics.
Step 5: Know which glass and coatings are worth paying for
This is where money makes a visible difference, and also where marketing gets slippery.
Worth paying for:
- Fully multi-coated lenses. Every air-to-glass surface has multiple anti-reflection layers. This improves brightness and contrast. “Coated” or “multi-coated” alone means less.
- Phase-corrected roof prisms. Essential for sharpness in roof prism designs.
- Dielectric prism coatings. Mirror coatings that can reflect more than 99% of visible light. They improve brightness and color.
- BaK-4 prism glass. Denser glass with better optical properties than BK-7, used in most quality binoculars.
Nice to have, not essential for a first pair:
- ED or HD glass. Extra-low dispersion glass reduces color fringing around high-contrast edges. It helps, but coatings and field of view matter more for everyday birding. Our guide to whether ED glass is worth it covers when it earns its cost. Note that “HD” is a marketing term with no fixed standard, so check what glass a maker actually lists.
Not worth paying for:
- Ruby or red lens coatings. They cut some glare but shift color, which works against bird identification.
- Zoom binoculars. Variable magnification usually means narrow fields, dim views and more complexity.
- Very high magnification, such as 16x or 20x handheld. The image shakes too much for birding.
Step 6: Check build quality and waterproofing
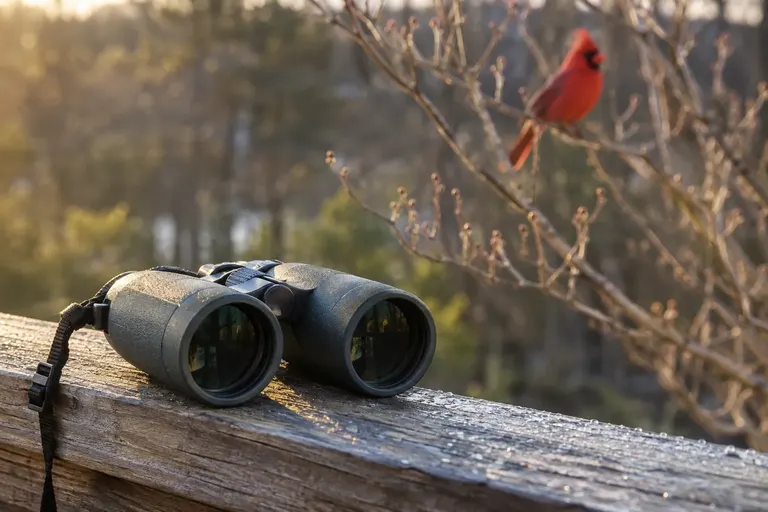
Birding means dew, drizzle and humid mornings. Look for binoculars described as waterproof and fogproof, with the interior filled with dry nitrogen or argon. The dry gas stops internal fogging and, because fungi cannot grow in an inert gas atmosphere, it helps prevent fungus inside the optics over time. Some makers list a specific rating. Nikon, for example, states the Monarch M5 is waterproof to 3.3 feet.
Also check for rubber armor that gives a secure grip, a smooth center focus wheel that turns without play, a firm center hinge that holds your eye width setting, and a locking or clearly marked diopter.
Step 7: Read the warranty before you buy
A strong warranty is part of the value. Warranties vary widely. Some brands offer unconditional lifetime coverage that transfers to a second owner. Vortex’s VIP warranty on the Diamondback HD, for example, is described as unconditional and lifetime with no receipt or registration needed. Others cover only manufacturing defects, or require registration within a set window.
Read the actual terms on the maker’s site. A pair that is slightly more expensive but fully covered against drops and accidents can cost less over its life.
Step 8: Make sure they fit you
Binoculars must fit your face and hands.
- Interpupillary distance. The center hinge must close far enough to match the distance between your eyes. People with narrow-set eyes, including many children and some adults, should check the minimum.
- Eyecups. They should click into a few positions and stay put.
- Diopter. It should let you balance the focus between your eyes. Our guide on how to adjust binoculars shows how.
- Grip. Your fingers should rest on the focus wheel naturally.
If you can, try a few pairs in a store or at a birding festival before buying.
How much should you spend on birding binoculars?
Think in tiers rather than a fixed number.
- Entry tier. Established brands now offer 8x42 roof prism binoculars with full multi-coatings, phase-coated BaK-4 prisms and waterproofing at entry-level prices. These are fine for backyard birding and beginners. They tend to fall behind in low light and at the edges of the view. See our best binoculars under $200.
- Mid tier. Often the best value. You typically gain dielectric coatings, sometimes ED glass, better focus mechanics and stronger warranties. See our best binoculars under $500.
- Upper mid tier. Brighter, sharper to the edges and better built.
- Premium tier. The best optics available. The gains are real but smaller for each extra dollar, and they show most at dawn, dusk and in challenging light.
For most birders, the jump from very cheap to entry tier is enormous, and the jump from entry to mid tier is clearly visible. After that, returns diminish.
Why very cheap binoculars are a false economy
The cheapest binoculars in toy aisles and gas stations save money up front and often cost you birds. Common problems include uncoated or partly coated lenses that make the image dim and washed out, BK-7 prisms that darken the edges of the view, loose focus wheels, and barrels that are slightly out of alignment. Misaligned barrels are the worst of these. Your brain strains to merge two images that do not match, and many people get headaches or eye fatigue within minutes.
Cheap pairs are rarely waterproof, so one humid morning can fog the inside for good. And without a meaningful warranty, a single drop ends their life. If a pair is frustrating to use, it ends up in a drawer, and you stop birding. A modest step up to an entry-tier model from an established optics brand avoids nearly all of these problems.
Should you buy used binoculars?
Used binoculars can be good value, especially from brands whose warranties transfer to new owners. Before buying, check four things:
- Collimation. Look at a distant straight line, such as a roof edge. If the two images do not merge comfortably, the barrels may be out of alignment.
- Haze or fungus. Shine a flashlight through the objective lenses. Cloudy patches or fine threads inside mean internal damage.
- Focus and hinge. Both should move smoothly and hold their position.
- Warranty terms. Confirm whether the maker covers second owners before you pay.
Avoid used pairs with rattles, cracked armor or stiff, gritty focus wheels.
Special cases: small hands, kids and older birders
A few buyers have specific needs worth planning for.
- Small hands and narrow-set eyes. Check the minimum interpupillary distance and the reach to the focus wheel. A 32 mm model may fit better.
- Children. Choose a pair with a hinge that closes narrowly, a light body and tough armor. Kids tend to lose interest if they cannot see through the binoculars easily.
- Older birders. Pupils open less with age, and those over 50 rarely dilate past about 5 mm. That narrows the brightness gap between 8x and 10x, but weight and steadiness matter more. Look for a comfortable 8x with long eye relief, and consider a harness to take weight off the neck.
- Shaky hands. Image-stabilized binoculars from brands such as Canon cancel small movements electronically. They cost more and need batteries, but they can make birding possible again for people with a tremor.
Where to buy, and how to try before you commit
The ideal is to hold several pairs before buying. Optics shops, nature centers, Audubon and bird club events, and birding festivals often have demo tables where you can compare models side by side. Even a short look tells you whether the eyecups fit your face and the focus wheel falls under your finger.
If you buy online, choose a seller with an easy return policy, and test the pair within the return window. Use it at dawn, under trees and at a feeder. Check that the image is sharp across most of the view, that the two sides merge without strain, and that the diopter holds its setting.
Our picks for a first serious pair
These picks are based on published specs, manufacturer documentation, independent expert reviews and patterns in verified owner feedback. We have not tested them hands-on.
Celestron Nature DX 8x42
Celestron lists a 388 foot field of view, 17.5 mm of eye relief, a 6.5 foot close focus, BaK-4 prisms, nitrogen-filled waterproofing and a weight of 22.2 oz. On paper it ticks every basic box for backyard and park birding.
Skip it if: you often bird in very low light or want the best edge sharpness.
Vortex Diamondback HD 8x42
The Diamondback HD lists a 393 foot field of view, 17 mm of eye relief, a 5.5 foot close focus, 21.3 oz weight, phase-corrected and dielectric-coated prisms, and Vortex’s VIP warranty. Owners commonly praise the wide view and the warranty.
Skip it if: you need maximum eye relief for thick glasses.
Nikon Monarch M5 8x42
The Monarch M5 adds ED glass and lists a 335 foot field, 19.5 mm of eye relief, an 8.2 foot close focus and 22.2 oz weight. It is waterproof to 3.3 feet and nitrogen filled. The long eye relief is its main strength.
Skip it if: you watch birds at window feeders only a few feet away.
Common mistakes that waste money
- Buying on magnification alone. A 12x or 16x label sells, but a steady 8x shows birds better.
- Choosing compact to save weight, then birding at dusk. 25 mm and 32 mm models dim quickly in low light.
- Trusting “HD” labels. Check the actual glass and coating specs instead.
- Ignoring eye relief. Glasses wearers lose part of the view with too little.
- Skipping the warranty terms. A cheaper pair with no drop coverage can cost more in the long run.
- Buying zoom or night vision novelty binoculars. They are not designed for birding.
- Never adjusting the diopter. A misadjusted pair looks soft even if the optics are good.
A quick checklist before you buy
- 8x42 for general birding, or 10x42 for open country.
- Field of view about 330 feet or more at 1,000 yards for 8x42.
- Eye relief of 16 mm or more if you wear glasses.
- Close focus around 7 feet or less for backyard use.
- Fully multi-coated, phase-coated BaK-4 roof prisms.
- Waterproof and nitrogen or argon filled.
- A written warranty you have read.
- A hinge that fits your eyes and a focus wheel your finger finds naturally.
Sources
Gear mentioned in this guide
Celestron Nature DX 8x42
Covers every birding basic on paper, with a wide 388 ft field, 17.5 mm eye relief and BaK-4 prisms, at an entry-level price.
- Best for
- First-time buyers and backup pairs.
- Skip it if
- You often bird at dusk or want the sharpest edges; higher tiers pull ahead in low light.
- Field of view
- 388 ft at 1,000 yd
- Eye relief
- 17.5 mm
- Close focus
- 6.5 ft
- Weight
- 22.2 oz
Vortex Diamondback HD 8x42
A very wide view, dielectric and phase-corrected prisms, and an unconditional lifetime warranty.
- Best for
- Most birders who want one pair that covers yard, woods and travel.
- Skip it if
- You wear thick glasses and need more eye relief.
- Field of view
- 393 ft at 1,000 yd
- Eye relief
- 17 mm
- Close focus
- 5.5 ft
- Weight
- 21.3 oz
Nikon Monarch M5 8x42
ED glass and a generous 19.5 mm of eye relief, which makes it a strong match for eyeglass wearers.
- Best for
- Glasses wearers and anyone who wants ED glass without going premium.
- Skip it if
- You watch birds very close; 8.2 ft close focus is long for window feeders.
- Field of view
- 335 ft at 1,000 yd
- Eye relief
- 19.5 mm
- Close focus
- 8.2 ft
- Weight
- 22.2 oz
Frequently asked questions
What is the best magnification for birding binoculars?
8x is the best starting point for most birders. It gives a wider field of view, a brighter image in shade and a steadier view than 10x, which makes birds easier to find and follow. The Cornell Lab notes that 8x and 10x are the most common birding magnifications. Choose 10x mainly for open country, shorebirds and hawks.
How much should I spend on my first birding binoculars?
Enough to get waterproofing, fully multi-coated lenses, phase-coated roof prisms and a solid warranty, which is the entry and mid-priced tiers from established brands. Past the mid tier, improvements are real but smaller, mainly brightness, edge sharpness and color. Very cheap binoculars often lack coatings and waterproofing and can be frustrating to use.
Are roof prism or porro prism binoculars better for birding?
Both can work well. Roof prism binoculars are slimmer and easier to waterproof, which is why most birding models use them. Good porro prism binoculars can deliver excellent images for less money because they are simpler to make, but they are bulkier and fewer are fully waterproof. At budget prices, a well-made porro can be a smart buy.
Do I need ED glass in birding binoculars?
Not for a first pair. ED glass reduces color fringing, the purple or green edges you see around a dark bird against a bright sky. It helps most with high magnification and high-contrast scenes. Good coatings, a wide field of view and proper eye relief matter more to everyday birding. ED becomes worth paying for as a step up.
What eye relief do I need if I wear glasses?
Look for about 16 mm or more of eye relief and twist-up eyecups that retract fully. That lets you see the whole field of view without removing your glasses. Frame shape matters too, so thick or deep-set lenses may need 18 mm or more. Always check the eye relief of the exact model and magnification.