How to Adjust Binoculars: Diopter, Eyecups and Focus
How to adjust binoculars diopter, eyecups and focus in five minutes: set eyecups, close the barrels to one circle, focus the left side, then tune the right.
In this article
- Quick answer: the five-minute setup
- What each control on your binoculars does
- Step 1: Set the eyecups before anything else
- Step 2: Set the barrel width until you see one circle
- Step 3: How to adjust the binocular diopter
- Step 4: Use only the center wheel while birding
- Common mistakes when adjusting binoculars
- What if you have astigmatism or a strong prescription?
- When the problem is the binoculars, not the setup
- How to keep your settings from drifting
- A quick setup routine for a new pair
- Do other binocular types adjust differently?
- How we put this guide together
- Sources
- Frequently asked questions
Here is how to adjust binoculars in about five minutes and four steps: set the eyecups for glasses or no glasses, close the hinge until you see one round image, focus the left eye with the center wheel on a detailed target 30 to 50 feet away, then sharpen the right eye with the diopter ring. Do it once, note the diopter setting, and from then on you only touch the center focus wheel.
Most “bad binoculars” complaints we see in owner reviews trace back to one of these steps being skipped. A mis-set diopter makes a good pair look soft. Eyecups in the wrong position cause dark rings and a shrunken view. This guide walks through each control, explains what it does, and shows how to spot when something is still off.
Quick answer: the five-minute setup
- Eyecups: fully up if you do not wear glasses while birding, fully down if you do.
- Barrel width (interpupillary distance): fold the barrels until the two circles merge into one clean circle.
- Zero the diopter: set the diopter ring to its middle mark (often “0”).
- Focus the left eye: close or cover the right side and turn the center wheel until a fixed target is sharp.
- Match the right eye: cover the left side and turn only the diopter ring until the same target is sharp. Leave it there.
That sequence matches the instructions from Nikon, Vortex and the Cornell Lab of Ornithology. The details below explain why each step matters and how to fix the common problems.
What each control on your binoculars does
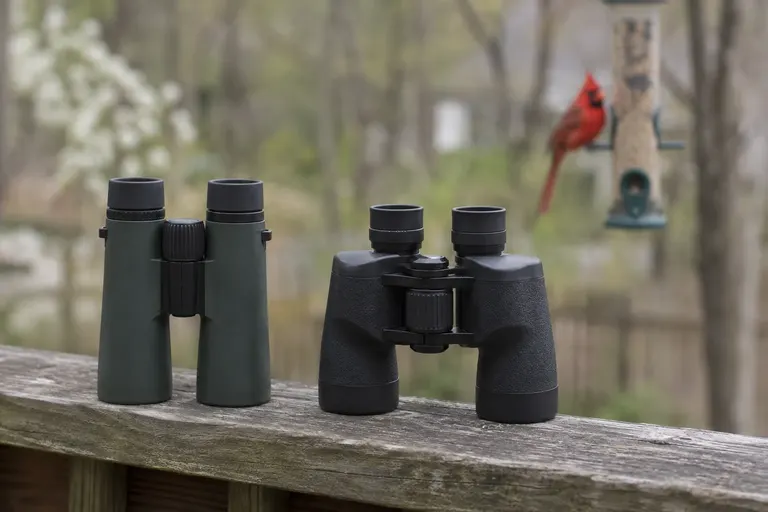
Before you adjust anything, it helps to know what you are looking at. Nearly every modern birding binocular, roof or porro prism, uses the same layout. If the terms on the box are new to you, our guide to what the numbers on binoculars mean covers magnification and objective size.
Center focus wheel
The large wheel on the bridge between the barrels moves the focus for both sides at once. This is the only control you should use while actually watching birds. Turn it one way for close birds at the feeder, the other way for birds across the yard.
Diopter adjustment
The diopter corrects for the difference between your two eyes. Very few people have identical eyes, and even a small mismatch makes one side slightly soft. Your brain tries to blend the two images, which is why a mis-set diopter often shows up as eye fatigue or a vague “not quite sharp” feeling rather than obvious blur.
On most birding binoculars, including the Nikon Monarch M5 and Vortex Diamondback HD, the diopter is a ring on the right eyepiece with a small scale marked with ”+”, “0” and ”-”. Some premium models place it on or inside the center focus knob, where you pull it out or unlock it before turning. Check your manual if you cannot find it.
Eyecups
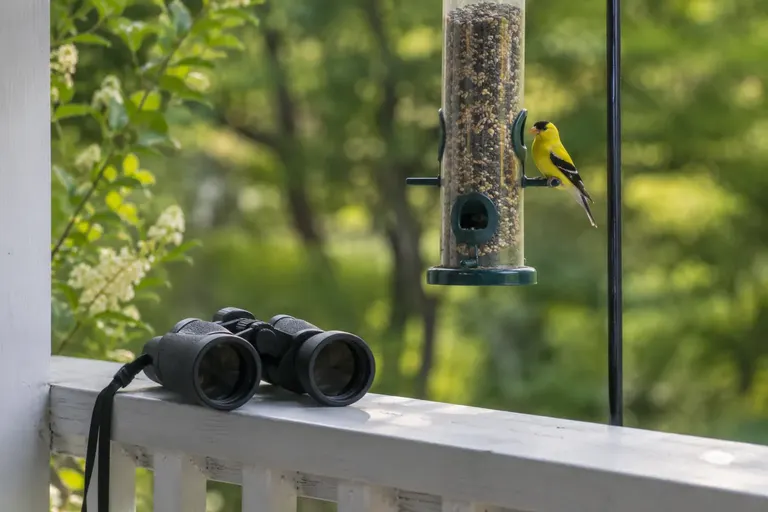
Eyecups hold your eye at the correct distance from the eyepiece lens. That distance is called eye relief. Most current binoculars use twist-up eyecups with two to four click stops. Older or budget models may use fold-down rubber cups.
Hinge (interpupillary distance)
The hinge in the middle lets you move the barrels closer or farther apart to match the distance between your pupils. Adult pupil spacing varies a lot, and many binoculars have a small scale on the hinge so you can return to your setting.
Step 1: Set the eyecups before anything else
Eyecups come first because they change how much of the view you can see, and that affects every later step.
If you do not wear glasses while birding
Twist the eyecups all the way up. Nikon’s instructions say to turn them counterclockwise to the fully extended position. This holds your eyes at the designed distance so the full field fills your view without dark edges.
If you wear glasses
Twist the eyecups all the way down, or fold rubber cups back. Your glasses already place your eyes some distance from the eyepiece. With the cups up, your eyes would sit too far back and you would see a smaller circle surrounded by black, a problem often called tunnel vision.
This is where eye relief matters. As a rough guide, glasses wearers want about 15 mm of eye relief or more. The Nikon Monarch M5 8x42 lists 19.5 mm, and the Celestron Nature DX 8x42 lists 17.5 mm, both comfortable figures on paper. If you wear glasses and your current pair never shows the whole field, the problem may be eye relief rather than setup. Our roundup of binoculars for glasses wearers compares models with long eye relief.
Try the middle positions
Intermediate click stops exist for a reason. If you see black crescents that come and go as you move (often called kidney beaning), your eye is probably too close. Try one click up. If the field looks small with a dark ring, your eye is too far away. Try one click down. Some people with deep-set eyes or thin-framed glasses end up on an intermediate stop, not either extreme.
Step 2: Set the barrel width until you see one circle
Hold the binoculars with both hands and look at something distant, such as a rooftop or a tree line. Start with the barrels spread wide, then slowly fold them together. The Cornell Lab’s beginner guide puts it simply: move the eyepieces together until the two circles merge into one.
Stop when you see a single, clean circle with no shading on either side. If you fold too far, the edges start to darken and you may see a figure-eight shape again. Aim for the point where the image is round and fully lit.
If your binoculars have a hinge scale, note the number. Couples who share one pair often have very different settings, so writing it down saves time.
Why this matters more than people think
When the barrels are too wide, each eye sees only part of its circle and your brain has to work harder to combine them. That causes eye strain, a sense that the image is “floating”, and headaches after a long session. Getting the width right also makes it easier to find birds quickly, which we cover in our guide to finding a bird in your binoculars fast.
Step 3: How to adjust the binocular diopter
This is the step most people skip, and the one that makes the biggest difference to sharpness.
Pick the right target
Choose a stationary object with fine detail about 30 to 50 feet away or farther: a street sign, bark on a tree trunk, or the text on a house number. Avoid moving targets and avoid anything very close, because a close target exaggerates small errors and makes the setting harder to judge.
Start from zero
Turn the diopter ring to its center mark. The Cornell Lab’s guide suggests first rotating the focus wheel and diopter to one end so you always start from the same reference point. Either way, you want a known starting position.
Focus the left eye with the center wheel
Close your right eye, or cover the right objective lens (the big front lens) with your hand or its lens cap. Covering is often easier than squinting, because squinting changes your focus slightly. Look through the left side and turn the center wheel until the target is as sharp as it gets.
Tip: turn the wheel past sharp, then back. Sharp focus sits at a point, and rocking gently through it helps you find the peak rather than stopping at “close enough.”
Focus the right eye with the diopter only
Now cover the left objective and open your right eye. Do not touch the center wheel. Turn the diopter ring slowly until the same target is sharp. Rock through focus the same way.
Check both eyes together
Uncover both sides and look at the target. It should look crisp and easy on the eyes. Now refocus on something much nearer, like a feeder, then on something farther. If the image snaps sharp for both eyes at every distance, you are done.
Record the setting
Note where the diopter sits on its scale. Mass Audubon’s guidance is clear that once it is set, you should not turn it again; you only use the main focus wheel. Diopter rings can get bumped in a car or a pack. Some models lock the diopter, but many do not. A tiny dot of paint pen or a strip of thin tape beside the mark lets you see at a glance if it moved.
Step 4: Use only the center wheel while birding
With the diopter set, all refocusing happens with the center wheel. Nikon’s instructions say to turn the focusing ring whenever you change the object you are viewing.
A few habits help in the yard:
- Pre-focus on the feeder. Leave the wheel set near the distance where most birds land, so you need only a small turn when one arrives.
- Learn the direction. Figure out which way turns focus closer and which turns it farther. After a week it becomes automatic.
- Use your middle finger. Many birders rest the index finger on top of the barrel and turn the wheel with the middle finger, which steadies the hands.
Focus speed varies by model. Some wheels go from close focus to infinity in about one full turn, others take two or more. Faster focus helps with birds that hop between branches, slower focus helps with fine adjustment on distant birds. Neither is wrong; it is a matter of habit.
Common mistakes when adjusting binoculars
Most setup problems come from a short list of errors. Here is what to check if your view still does not feel right.
| Symptom | Likely cause | Fix |
|---|---|---|
| One eye sharp, the other slightly soft | Diopter not set, or set with the wrong target | Redo Step 3 on a detailed target 30 to 50 ft away |
| Small field with a black ring around it | Eyecups up while wearing glasses, or too little eye relief | Twist eyecups down; try an intermediate stop |
| Black crescents that come and go | Eye too close to the eyepiece | Raise the eyecups one click |
| Two images or a figure-eight | Barrel width set too wide | Fold the hinge until you see one circle |
| Eye strain or headache after a few minutes | Width or diopter off; in rare cases, prisms out of alignment | Redo Steps 2 and 3; if it persists, contact the maker |
| Sharp at the feeder but soft far away (or the reverse) | Diopter set on a target that was too close | Reset the diopter using a farther target |
| Diopter setting keeps changing | Ring bumped in storage or bag | Mark the setting; store the binoculars in a case |
Adjusting the diopter with the center wheel
The most frequent mistake is turning the center wheel during the right-eye step. That undoes the left-eye setting. When the right eye is uncovered, only the diopter ring moves.
Setting up with glasses, then birding without them (or the reverse)
If you sometimes bird with glasses and sometimes without, the eyecup position changes, and if your glasses correct for a difference between your eyes, the diopter setting may change as well. Many birders keep two diopter marks: one for glasses, one for contacts or bare eyes.
Sharing binoculars and never resetting them
When a partner or grandchild borrows your binoculars, the hinge and diopter usually move. Resetting takes under a minute if you know your numbers.
Blaming the binoculars too soon
A surprising number of complaints in owner reviews describe symptoms, like a slightly soft image or eye fatigue, that the setup steps above fix. Before returning a pair, run through the full setup on a detailed target in good light.
What if you have astigmatism or a strong prescription?
The diopter corrects for a difference in focus between the eyes. It does not correct astigmatism, which blurs lines in one direction more than another. If you have significant astigmatism, you will probably see a sharper image with your glasses on and the eyecups down.
If your prescription is mainly nearsightedness or farsightedness without much astigmatism, you may be able to bird without glasses. The center wheel covers the overall focus shift, and the diopter handles the difference between eyes. Range varies by model, so check the diopter range in the manual if your eyes differ a lot. An eye care professional can tell you whether your prescription falls within what binoculars can correct.
When the problem is the binoculars, not the setup
Some issues cannot be fixed by adjustment.
Collimation (prism alignment)
Each barrel must point in exactly the same direction. If a pair is dropped, the prisms can shift. The result is a view that never merges cleanly, or merges but causes strain within minutes. Collimation is a factory repair. Most major brands offer warranty service; check your warranty terms before sending anything.
Internal fogging
Fog that forms inside the barrels, not on the lenses, means the seal has failed. Waterproof, nitrogen or argon filled binoculars should not fog internally. External fogging on cold mornings, when you carry binoculars from a warm house into cold air, is normal and clears as the glass warms up.
Diopter that will not stay put
If the ring spins too freely and drifts on its own, the detent or friction may be worn. Some makers will service this under warranty.
How to keep your settings from drifting
Once everything is set, a few habits keep it that way.
- Use a harness or a short strap. A binocular swinging on a long strap takes knocks that can move rings and, over time, jar prisms. A harness keeps it tight to your chest. See our picks for binocular harnesses and straps.
- Store in the case with eyecups down. This protects the eyecups from being twisted or crushed and keeps the diopter ring away from pressure.
- Keep lenses clean the right way. The Cornell Lab advises brushing off dirt before wiping lenses with a soft cloth. Wiping grit across a lens can scratch coatings.
- Let fogged binoculars dry slowly. The Cornell Lab suggests leaving damp binoculars in a warm, dry spot for several days if condensation appears.
A quick setup routine for a new pair
If you just unboxed binoculars, here is a full routine from start to finish:
- Attach the strap and fit the rain guard and objective caps so you know where they go.
- Read the manual page that shows where the diopter is and whether it locks.
- Go outside in daylight. Indoors, the targets are too close and the light too dim.
- Set the eyecups for glasses or no glasses.
- Fold the barrels to one circle and note the hinge number.
- Zero the diopter, focus the left eye with the center wheel on a detailed target.
- Cover the left side, focus the right eye with the diopter ring only.
- Check near and far targets with both eyes. Fine-tune if needed.
- Mark the diopter setting.
- Practice raising the binoculars to a fixed target 20 times so the motion becomes natural.
If you are still choosing a pair, our guide on how to choose binoculars for birding explains which features matter for comfort, and our binoculars for beginner birders roundup lists models with easy controls. For the broader starter kit, see birding for beginners: the gear you actually need.
Do other binocular types adjust differently?
A few designs differ from the standard layout.
Individual-focus binoculars
Some marine and budget binoculars have no center wheel. Each eyepiece focuses separately. You set each side once and rely on depth of field. They are simple and rugged, but refocusing from a feeder to a distant tree is slow, so they rarely suit birding.
Compact binoculars
Small folding binoculars with a double hinge work the same way, but the barrels can also fold differently. Make sure both hinges are opened fully before you set the width. The diopter is usually on the right eyepiece.
Porro prism binoculars
Porro prism models, with the offset “classic” shape, use the same controls. The diopter is usually on the right eyepiece. If you are weighing designs, our explainer on roof prism vs porro prism binoculars compares them.
How we put this guide together
We have not written this from hands-on testing of specific pairs. The steps come from manufacturer instructions (Nikon, Vortex and Swarovski manuals), setup guides from the Cornell Lab of Ornithology and Mass Audubon, and recurring patterns in owner feedback about setup problems. Specs quoted for individual models come from the maker’s published specifications.
Sources
Frequently asked questions
How do I know if my binocular diopter is set correctly?
Focus on a sign or a branch about 30 to 50 feet away. Close your right eye and check that the left view is sharp, then close your left eye and check the right view without touching the center wheel. If both look equally crisp, and the image stays sharp as you refocus near and far, the diopter is right. If one side needs a nudge, adjust only the diopter ring.
Which side is the diopter on binoculars?
On most birding binoculars the diopter ring sits on the right eyepiece, just below the eyecup. Some premium models put the diopter control on or inside the center focus knob, where you pull it out or unlock it before turning. A few older or budget models have a separate focus on each eyepiece instead. Your manual shows the exact location.
Should eyecups be up or down with glasses?
If you keep your glasses on, twist the eyecups fully down so your eye can get close enough to see the whole field. Without glasses, twist them fully up. If you see a dark ring or black crescents, try an intermediate click stop. Many people with glasses find a half-step up works better than fully down.
Do I need to reset the diopter every time?
No. Once the diopter matches your eyes, leave it alone and use only the center wheel. Note the setting on the scale, or mark it with a thin paint pen, because the ring can get knocked in a bag or case. Check it again if your prescription changes or if someone else borrows the binoculars.
Why do my binoculars show two images or feel like they strain my eyes?
Usually the barrels are set too wide or too narrow for your eyes. Close or open the hinge until you see one round image. If you still see a double image with the hinge set right, the prisms may be out of alignment (collimation). That needs a repair from the maker, not a user adjustment.